Welcome to Lawnmowing99! Today, I’m excited to share my journey with growing shallots—a tasty and versatile cool season crop. Over the years, I’ve discovered that growing shallots isn’t just rewarding; it’s also a surprisingly easy way to add gourmet flair to home-cooked meals. In this information, I’ll walk you through the lessons I’ve learned, from choosing the right varieties to dealing with common challenges and enjoying a bountiful harvest.
Why I Love Growing Shallots
Shallots have always been one of my favorite crops, and they hold a special place in my garden. Unlike onions, they have a mild, sweet flavor that adds depth to dishes without overpowering them. They’re incredibly versatile in the kitchen, and their delicate taste makes them perfect for everything from salad dressings to sautés. This love for the flavor and versatility of shallots is what initially inspired me to start growing them in my own backyard.
Getting Started with Shallots
I still remember my first attempt at planting shallots. I didn’t know much about this cool season crop back then, so I started with a small batch to experiment. I chose a well-drained, sunny spot in my garden bed—one that didn’t hold too much moisture, as shallots don’t like sitting in wet soil. Preparing the soil was key; I added a generous amount of compost to ensure it was nutrient-rich. Over time, I learned that well-drained, loamy soil is ideal for growing shallots, helping them thrive and preventing issues like rot.
Choosing the Right Shallot Varieties
Over the years, I’ve experimented with different shallot varieties, each bringing unique qualities to my harvest. For instance, I found that the ‘French Red’ shallot has a rich, complex flavor, while the ‘Dutch Yellow’ variety has a mild, buttery taste. Deciding which variety to plant depends on what you like in the kitchen. I recommend starting with one or two varieties to see what grows well in your area and suits your culinary style.
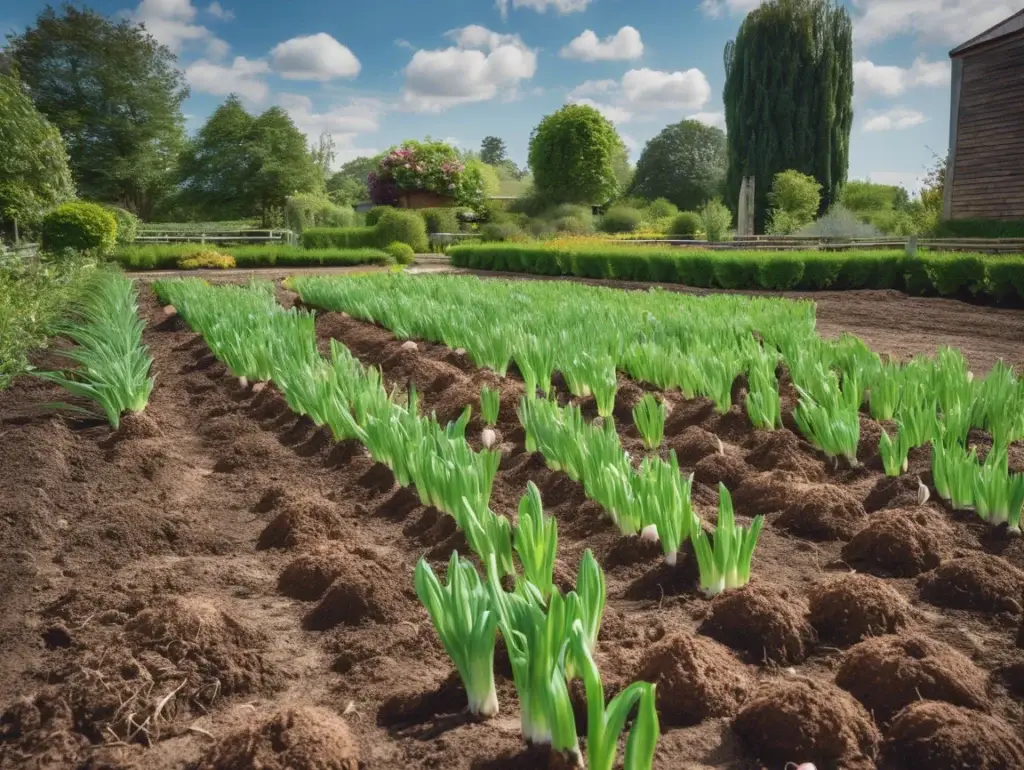
Planting Shallots Step-by-Step
Planting shallots is straightforward, but it’s important to get the timing right since they’re a cool season crop. I typically plant my shallots in early autumn, just as temperatures begin to cool. Shallots grow best when the soil is cool but not frozen, so this timing works perfectly. Each shallot bulb will produce several new bulbs by the end of the growing season.
Here’s my tried-and-true method:
- Separate the Bulbs: Start by separating the shallots into individual bulbs.
- Plant Bulbs 6 Inches Apart: I space my bulbs about 6 inches apart, leaving enough room for them to grow. Shallots don’t like crowding, so give each bulb its own space.
- Plant with the Pointy End Up: Always plant shallots with the pointed end facing up, about 1 inch deep. This positioning encourages healthy growth and keeps the bulbs from rotting.
Common Challenges in Growing Shallots
Growing shallots isn’t without its challenges, especially when it comes to pests and diseases. My first few seasons, I faced issues with pests like onion maggots and aphids. After losing a few crops, I learned that regular monitoring and natural deterrents work wonders. I often use a garlic spray, which has helped keep pests at bay without affecting the plants. Mulching around the base of the shallots also helped control weeds and keep moisture levels consistent.
Another challenge I faced was ensuring proper watering. Shallots like moisture, but overwatering can lead to rot. I learned to water deeply but infrequently, making sure the soil has time to dry out between waterings. This approach helped me avoid many of the issues that can plague shallot crops.
Harvesting Shallots
One of the best moments in the garden is harvesting shallots. It’s satisfying to pull these flavorful bulbs from the soil after months of growth. I usually harvest when the tops start to yellow and flop over, which is a good indicator that they’re ready. If you pull them too early, they won’t have fully developed, but waiting until the tops are completely brown might mean they’re overripe.
Once harvested, I cure the shallots by laying them out in a dry, shady spot for a week or two. This process enhances their flavor and ensures they store well. After curing, they’re ready for storage and can last up to six months if kept in a cool, dry place.
Culinary Uses of Shallots
What I love most about growing shallots is getting to enjoy them in my cooking. From caramelizing them for pasta dishes to using them raw in vinaigrettes, shallots bring a unique flavor that enhances many recipes. In fact, one of my favorite ways to use homegrown shallots is to roast them whole—they become sweet and almost creamy, perfect as a side dish or tossed into salads.
Closing Thoughts
Growing shallots has been one of the most rewarding gardening experiences for me. Not only are they a tasty and versatile cool season crop, but they’re also fairly easy to grow once you understand their needs. I hope this information inspires you to try your hand at cultivating shallots in your own garden.
If you enjoyed this guide and found the information helpful, please like, share, and subscribe to Lawnmowing99 for more gardening tips and inspiration. Here’s to a bountiful harvest and delicious meals with your homegrown shallots! Happy gardening!